
SpeedyBee F405 AIO: Power Your FPV Flight
In FPV drone flying, the flight controller is the heart of the aircraft, ensuring stability and precision during flight. It…


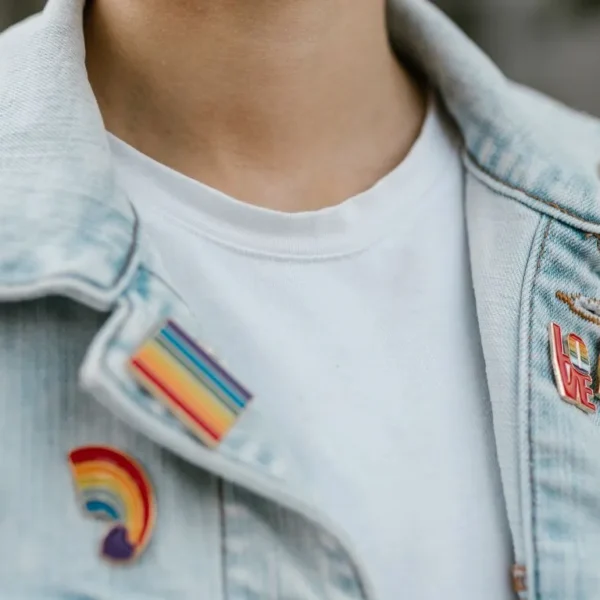
BaddieHub: The Ultimate Guide to Trendy Fashion and Social Media Influence
BaddieHub has taken the social media world by storm, becoming a go-to platform for anyone looking to stay on top of the latest fashion trends, beauty tips, and social media influence strategies. Whether you’re an aspiring influencer or simply someone who loves to keep up with the newest styles, BaddieHub offers a wealth of resources to help you shine.
What is BaddieHub?
BaddieHub is an online community and platform that celebrates modern beauty and fashion. It caters to individuals who embrace bold, confident styles and aim to make a statement with their looks. This platform has grown in popularity due to its comprehensive approach to fashion, beauty, and social media influence.
The Rise of BaddieHub
The rise of BaddieHub can be attributed to its unique blend of fashion-forward content, beauty tutorials, and social media tips. Unlike other platforms, BaddieHub focuses on creating a supportive and inclusive community where users can share their styles, learn from one another, and grow their online presence.
Key Features of BaddieHub

Trendy Fashion Tips
At BaddieHub, you’ll find a plethora of fashion tips that cater to various styles and preferences. From streetwear to high fashion, the platform covers it all. Users can explore outfit ideas, style guides, and trend reports to keep their wardrobes fresh and exciting.
Beauty and Makeup Tutorials
Beauty enthusiasts will love the extensive collection of makeup tutorials available on BaddieHub. These tutorials range from everyday looks to glamorous, red-carpet-ready styles. The step-by-step guides ensure that even beginners can achieve stunning results.
Social Media Influence Strategies
For those looking to build their social media presence, BaddieHub offers invaluable advice on how to grow followers, increase engagement, and create compelling content. The platform provides tips on everything from photography and editing to branding and collaboration.
Community and Networking Opportunities
BaddieHub isn’t just a resource for fashion and beauty; it’s also a vibrant community where like-minded individuals can connect. Users can share their own tips, collaborate on projects, and support one another’s growth.
How to Get Started with BaddieHub
Creating a Profile
The first step to joining the BaddieHub community is creating a profile. This allows you to personalize your experience, follow your favorite influencers, and save content for later.
Exploring Content
Once your profile is set up, you can start exploring the wealth of content available. Browse through fashion tips, beauty tutorials, and social media strategies to find the information that resonates with you.
Engaging with the Community
Don’t be shy! Engage with other users by liking, commenting, and sharing content. Join discussions and participate in community events to build connections and grow your network.
Why BaddieHub Stands Out
Inclusive and Diverse
One of the standout features of BaddieHub is its commitment to inclusivity and diversity. The platform celebrates all forms of beauty and encourages users from all backgrounds to express themselves.
Expert Advice
BaddieHub’s content is created by experts in the fashion, beauty, and social media industries. This ensures that users receive high-quality, reliable advice that they can trust.
User-Friendly Interface
The platform is designed to be user-friendly, making it easy for anyone to navigate and find the information they need. Whether you’re a tech-savvy influencer or a casual user, you’ll find BaddieHub intuitive and accessible.
Fashion Trends on BaddieHub
Streetwear and Casual Chic
Streetwear continues to dominate the fashion scene, and BaddieHub has plenty of tips on how to rock this style. From oversized hoodies to trendy sneakers, you’ll find inspiration for creating the perfect casual chic look.
Elegant and Sophisticated
For those who prefer a more polished appearance, BaddieHub offers guides on elegant and sophisticated styles. Learn how to put together timeless outfits that exude class and confidence.
Seasonal Fashion Tips
Stay ahead of the curve with BaddieHub’s seasonal fashion tips. Whether it’s summer dresses, autumn layers, or winter coats, you’ll find advice on how to update your wardrobe for every season.
Beauty Tips and Tricks on BaddieHub
Skincare Routines
A good skincare routine is the foundation of any beauty regimen. BaddieHub provides detailed skincare guides tailored to different skin types and concerns, ensuring that you can achieve a healthy, glowing complexion.
Makeup Tutorials
From natural looks to bold, dramatic makeup, BaddieHub’s tutorials cover a wide range of styles. Learn the latest techniques and trends to keep your makeup game strong.
Haircare and Styling
Your hair is an essential part of your overall look, and BaddieHub offers plenty of advice on how to care for and style your hair. Discover tips for maintaining healthy hair, trying new hairstyles, and using the right products.
Building Your Social Media Presence with BaddieHub
Content Creation Tips
Creating high-quality content is key to growing your social media presence. BaddieHub provides tips on photography, video production, and editing to help you create visually appealing content that stands out.
Engagement Strategies
Engagement is crucial for building a loyal following. Learn how to interact with your audience, respond to comments, and foster a sense of community on your social media profiles.
Collaborations and Partnerships
Collaborating with other influencers and brands can significantly boost your reach. BaddieHub offers advice on how to find collaboration opportunities and make the most of these partnerships.
Success Stories from BaddieHub
Rising Influencers
Many influencers have risen to prominence through BaddieHub. Their success stories serve as inspiration and provide valuable insights into what it takes to build a successful online presence.
Brand Partnerships
BaddieHub has helped numerous users secure brand partnerships, leading to exciting opportunities and increased visibility. These stories highlight the potential for growth and success within the community.
FAQs
What is BaddieHub?
BaddieHub is an online platform and community that focuses on fashion, beauty, and social media influence, offering tips, tutorials, and networking opportunities.
How can I join BaddieHub?
You can join BaddieHub by creating a profile on their website. This allows you to personalize your experience and engage with the community.
What kind of content is available on BaddieHub?
BaddieHub offers a wide range of content, including fashion tips, beauty tutorials, social media strategies, and more.
Is BaddieHub suitable for beginners?
Yes, BaddieHub is designed to be user-friendly and accessible for users of all experience levels.
Can I collaborate with other users on BaddieHub?
Absolutely! BaddieHub encourages collaboration and networking among its users.
Are the beauty tips on BaddieHub suitable for all skin types?
BaddieHub provides skincare and beauty tips tailored to different skin types and concerns, ensuring that everyone can find suitable advice.
Conclusion
BaddieHub is more than just a platform; it’s a thriving community where fashion, beauty, and social media enthusiasts can come together to learn, share, and grow. Whether you’re looking to stay on top of the latest trends, improve your beauty routine, or build your social media presence, BaddieHub offers the resources and support you need. Join BaddieHub today and start your journey towards becoming a fashion and beauty icon.